
Matte Painting: Environments for Film
3h 22mIntermediate2016-11-07
Authors
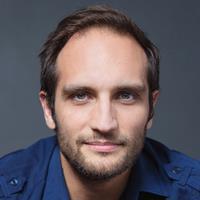
Danny Janevski
Matte Painting Supervisor for DreamWorks
Course details
Modern matte painting is a multidiscipline art. Matte painters need to know how to create 3D geometry, extend worlds with nodes and macros, create detailed materials and shaders, digitally paint convincing detail, and composite the many layers together into a final render worthy of the big screen. Danny Janevski, matte painting supervisor for DreamWorks, shows how to master these techniques using software such as Clarisse, ZBrush, World Machine, Photoshop, and NUKE. He covers a wide variety of current industry techniques used in creating feature films, including layout and set breakup, top-down renders, environment and terrain generation, painting, and final render.
Learning objectives
Laying out geometry in Clarisse
Importing and separating geometry in ZBrush
Creating top-down renders
World building with World Machine
Creating shaders in Clarisse
Matting painting the sky and mountain in Photoshop
Compositing and rendering the matte painting in NUKE
Learning objectives
Laying out geometry in Clarisse
Importing and separating geometry in ZBrush
Creating top-down renders
World building with World Machine
Creating shaders in Clarisse
Matting painting the sky and mountain in Photoshop
Compositing and rendering the matte painting in NUKE
Skills covered
World MachineClarisse iFXIsotropicsNukeThe FoundryDigital PaintingZBrushPixologicMayaAutodeskAnimation and IllustrationDeep Dive (X:Y)
Concepts
Introduction
- Welcome
- What to know
- Exercise files
Layout
- Concept frames or inspiration
- Layout geometry in Clarisse
- Layout importance and set breakup
Asset Creation
- Import and separate geometry in ZBrush
- Renaming geometry
- Creating a top-down render
World Building and Terrain Generation
- Import into World Machine
- Creating nodes in World Machine
- Adjusting height and resolution
- Using erosion in World Machine
- Adding color to erosion
- Mesh and texture output
- Advanced macros
- Rendering through tiled output
- Converting files to use with Clarisse
Look Development
- Import OBJs into Clarisse
- Setting up Lookdev
- Shader creation using textures and masks
- Creating a layered shader
- Creating a rock and sand shader
Final Layout
- Creating the final layout
Project Setup
- Projection setup
- Creating render layers
- Resolution
Matte Painting
- Key art - Paint setup
- Key art - Creating a haze
- Key art - Sky setup
- Key art - Painting the sky
- Key art - Painting the mountain
- Key art - Final touches
- Exporting layers
Projection
- Importing layers into Nuke
- Shuffle node and scene setup
- Projection
- Compositing
- Rendering
- Final render
Conclusion
- Next steps